Showing posts with label Americana Decor Chalky Finish. Show all posts

Thursday, July 22, 2021

Desk Makeover with RE-DESIGN WITH PRIMA!

As much as I love Ikea for a shelf or quick, functional fix, I'm not a huge fan of their fabric or color choices. Can we say BORING?! This Ikea desk was plain white, nicked in a few places and truly in need of a new look.  The best part is that I scored it for $15, so basically it was a canvas for me to experiment on.  Lately I've been working with RE-DESIGN WITH PRIMA products and they've changed the way I look at furniture makeovers, so I decided to try their Decor Transfers on the face of the drawers & cabinet. WOW do they pack a punch!  I'll leave a list of what I used below, but definitely check out RE-DESIGN WITH PRIMA and paint up some of your Ikea furniture!  
Now get out there and Make Your Mark!
Caravan Decor Transfer and brass handles really spruced this up!
A nice desk makes you want to sit at it and even pay your bills!
Everything I used for this project:
Re-Design with Prima Caravans Decor Transfer: https://bit.ly/3dSrAMB Bohemian Florals Clearly Aligned Decor Stamps: https://bit.ly/36yoLfD White Decor Ink Pad: https://bit.ly/3wmmvCr Americana Decor Chalky Finish Paint: https://bit.ly/3jjCa2x MY AMAZON STORE: https://www.amazon.com/shop/markmontano
Watch how to make this here!
or watch how to make it on YouTube here: https://youtu.be/lXDidLSX_zU

Generally I'm not a huge fan of red white & blue in decor, but the light blues and different shades really made this pattern sing to me!
Time to sit down and start writing another book, right?!

Saturday, September 14, 2019

70s Buffet Makeover

I see these buffets at my local thrift store, yard sales and even on the street on big furniture pick-up days!  They're super clunky BUT they have a ton of room in them and they're super fun to makeover.  Painted in bright colors they're the perfect outdoor storage, too.  I'm using mine for all of my DecoArt paints and filming equipment since I film most of my videos on the back patio.   Also, since I live in LA and I have a covered patio, I don't have to worry about snow or too much rain so this piece will weather nicely.  Think twice before saying no to ugly furniture and don't forget to 
Make Your Mark!
 Make your patio into another room!
Before the paint and fabric makeover!
I love using Americana Decor Chalky Finish Paints! 
 Filled with my DecoArt Paints!

Watch how I did it here!

Patio perfect!

Friday, October 5, 2018

Halloween Candles DIY

Like many of you, I'm obsessed with Halloween!  Every year I make something to add to my collection of decorations and this year it was these hauntingly beautiful candles.  Totally my style!  I used some amazing silicone molds from Prima and jazzed them up with my favorite DecoArt paints.  So easy, even an unskilled skeleton could do it!  Happy Halloween, possums! 
Don't forget to Make Your Mark!
 My skull looks too real!
Love the hints of gold so much!

Watch how to make them here!
STUFF I USED
Pillar Candles
DecoArt Matte Metallics in Vintage Brass
Stick-Um Candle Adhesive
Prima Silicone Molds
Hair Dryer
Large Glue Gun
Americana Decor Chalky Finish in Carbon
HERE'S HOW
1. & 2. Fill your favorite Prima and skull molds with hot glue and let them dry
*Should only take about 5 minutes
3.  Warm the hot glue pieces around a cup with a hair dryer to curve them so 
they adhere to the candle easier
4. & 5. Spread a generous amount of Stick-Um Candle Adhesive to the back of the hot glue pieces and adhere them to the candle
*IF you're having a hard time sticking your pieces to the candle, use a straight pin.  Hold the pin with pliers, heat it up and stick it through the hot glue into the candle
6. Warm the pieces again if you need to
7. Paint the entire candle with chalky finish in Carbon
8.  When the chalky finish is dry, dry brush the Matte Metallics over the edges and molded pieces
9. Display with pride!

Happy Halloween!

Friday, July 13, 2018

Scrap Wood Chandelier DIY

A few weeks ago I made upholstered stools from thrift store chairs and instead of just tossing the backs (made from beautiful spindles) I saved them to create this colorful, scrap wood chandelier.  It's been hanging from a tree in my back yard and I absolutely love it....It's magical!  It took some time, but was absolutely worth it.  Grab a solar light and stick it right in the middle and you're good to go.  Figure out ways to use all the scraps and don't forget to Make Your Mark!
 Garden gorgeous!


Watch how to make it here!
STUFF I USED
Americana Decor Chalky Finish Paint
Thrift Store Chairs
Small Cup Hooks
Wire and Wire Cutters
Jigsaw, Sander and Drill
Wire Plant Basket
 HERE'S HOW
1. & 2. Cut the spindles off the back of the chair and then cut them into 6" to 10" long pieces
3.  Sand the pieces on both ends
4. & 5.  Paint the pieces in different colors of Americana Decor Chalky Finish
*While you're at it you can paint the wire basket with Chalky Finish, too!
6. Dry brush the spindles with contrasting colors so that each piece has 2 different colors
7.  Drill a small hole in the top of each piece
8.  Add a small cup hook to each piece
9. Hang the pieces from the bottom two rows of the basket
10. & 11.  Create S-hooks from wire to attach the top row of pieces
12.  Hook 2 pieces together to create your center hanging piece

Add a solar light in the middle and you're done!

Tuesday, March 20, 2018

Roadside Rescue Chair Makeover

Do you ever just pull over to the curb and check out a pile of furniture ready for the heap?  I do it all the time!  I've found some amazing pieces casually tossed out by people who were moving, redecorating or just plain tired of something that was in great condition.  These discarded pieces are the perfect canvas for every crazy idea I want to try...because they are free.  Free equals fearless in my book!  This chair looked so sad outside of a local law firm in my neighborhood and I had to bring it home just to play around with some new techniques and to see if I could change the vinyl up a bit. It's not totally my style, but I'm still pretty happy with the results.  Don't be afraid to dumpster dive and always try to Make Your Mark! 

Handsome and ready for a change!
Light blue vinyl...Why not?!

Learn my techniques here!
STUFF I USED
An old vinyl upholstered chair
DecoArt Patent Leather Paint in Turquoise
Americana Decor Stencils
Americana Decor Chalky Finish Paint in Keepsake and Bestow
Americana Decor Light Satin Varnish
Americana Decor Metallics in Vintage Brass
HERE'S HOW
*Before you start make sure to remove all dirt and dust
1.  Paint the leather with DecoArt Patent Leather in Turquoise
2.  Paint the wood with chalky finish in Keepsake
3.  Coat the chalky finish with Light Satin Varnish and let dry
4.  Paint over the details with chalky finish in Besto
5. & 6.  Wipe away the Bestow before it dries with a rag to expose the details
*The Bestow will fill in the cracks and highlight any details & creases
7.  Stencil the seat with Vintage Brass
8. Stencil the upper part of the legs with more Vintage Brass
Have a seat!
I may put this back in front of the law firm where I found it.....Just to see if they will love it again!

Tuesday, March 6, 2018

Marie Antionette Table Makeover

I found this table for $15 at my local thrift store and could not pass it up!  I'm sure it came from a recently closed,  Hollywood motel in my area because there were at least 10 of them!  At first glance I thought it was super tacky, but after taking a closer look and seeing all of the details, I quickly snapped it up for this makeover project.  Not exactly sure how Marie Antionette became the inspirations,  I just kept thinking of her when I was painting the base in pink and gold.  When that happens, you go with it!  If you have a better name, I'd love to know!  Remember to always look for the potential in things and always try to Make Your Mark!
 All this needs is a pink phone!
Looks so pretty on my faux lawn!
Pink with black and white stripes REALLY does it for me!
Watch how I did it here!
STUFF I USED
Thrift store table
Masking Tape
Sander
Gold metallic marker
HERE'S HOW
1.  Sand down the imperfections on the table top if there are any
2.  Paint the top in Americana Decor Satin Enamels in white and let dry
3.  Paint the base in Americana Decor Chalky Finish in Remenisce
4.  Create stripes with masking tape across the table top
*I used 1 1/2" wide tape and spaced it every 1 1/2" for even stripes across the table
5.  IMPORTANT!  Once the tape is down, add more white paint along both edges 
of each strip of tape
*The white paint will seep under the tape and create a barrier so the black does not seep under the tape and create fuzzy lines
6.  Carefully paint black in between the taped lines
7.  Carefully remove the tape when the paint is almost dry
8.  Paint the edge of the table with Americana Decor Metallics in Vintage Brass
*This is hands down my favorite metallic paint!
9.  Edge the table with a paint marker so that you have a perfectly crisp metallic gold edge
10. & 11. Bring out the details by using a dry brush dipped in a tiny bit of gold and brushing it across the flourishes
12.  Ready to decorate!


Tuesday, January 9, 2018

Underwater Dresser

I saw this sad little dresser at a thrift store just begging me to take him home.  Seems the broken tracks on the drawers were a "no deal" for any other potential buyer, but not for me!  A little glue, a few nails and he was good as new!  Recently I was inspired by a beautiful two-tone desk and decided to give the technique a try with a few little differences.  I added hints of gold to highlight the edges and details and compliment the hardware.  What a difference a little bit of paint makes, right!  Remember to always give your old furniture a second chance with a coat of paint.  Oh, and always Make Your Mark!
 Styled on the back porch and waiting for a room inside my house!
The glorious gold details!

Watch how to make it here!
STUFF I USED
Thrift store dresser
 HERE'S HOW
1. Remove the hardware
2. Paint the edges and details in metallic gold and let dry
3.  Paint over the metallic gold with the clear cream wax and let dry
4.  Paint the top 1/3 of the dresser in Adirondack chalky finish
5.  Blend the lower part of the Adirondack area with Honor chalky finish
6.  Continue painting the lower half of the dresser in Honor
7.  Using a rag or fine sandpaper, rub the areas that were painted with wax to expose the metallic gold
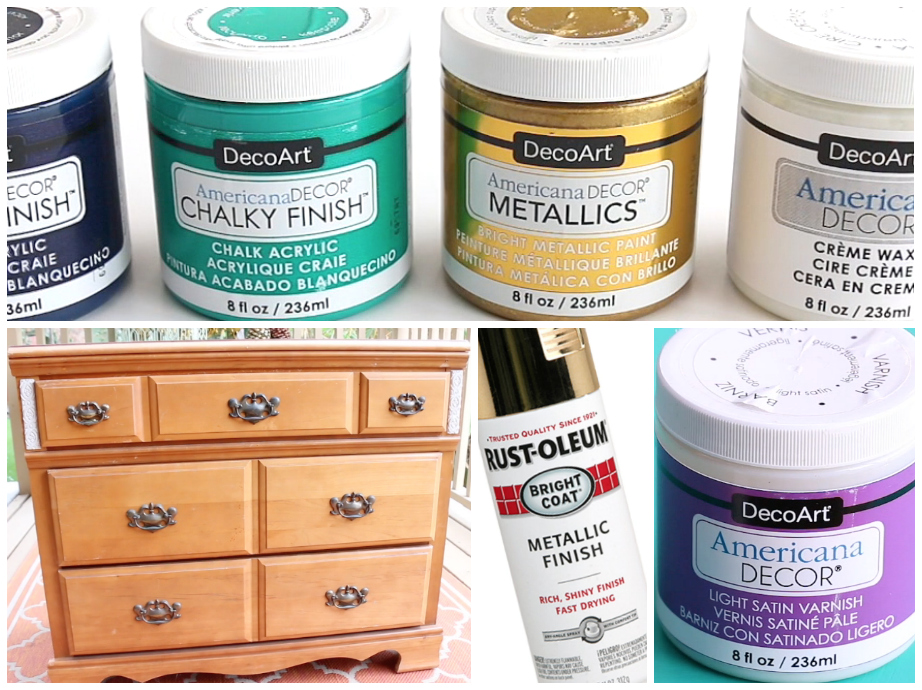
8.  Spray paint the hardware in bright metallic gold
9.  Seal the chalky finish with a light satin varnish
So in love!

Tuesday, November 7, 2017

Cardboard Crowns DIY

Who doesn't need a cardboard crown?  The metal versions are just so beautiful, but a little out of my price range for a decorative item, so I thought it would be fun to craft one up the old fashioned way........with cardboard and glue.  Hey, a little paint and some Mardi Gras beads and no one will even know you made it from a box!  Use them to decorate for the holidays or to wear with your King Arthur cos play costume.  Remember to recycle and always Make Your Mark!
 Perfect for my holiday decorating!


Watch how to make them here! 
STUFF I USED
Americana Decor Metallics in Vintage Brass
Pearls & rhinestone trim
Newspaper and cardboard
Clothespins
Americana Decor Decoupage in Matte
Americana Decor Chalky Finish in Innocence, Treasure and Artifact
Hot glue gun and white glue
1 1/2" foam balls
 HERE'S HOW
1. & 2.  Cut 6 arches in cardboard and newspaper
3.  Cut a 22" x 1" wide strip of cardboard for the band
4.  Glide all the pieces along a table edge to create a slight curve on each piece
5.  Glue the 22" long piece together to create a band
6.  Glue the arches evenly around the band and clamp in place with clothespins while they dry
7. Hot glue the tops of the arches around a foam ball
8.  Decoupage newspaper over all of the pieces of the crown
9.  Mist the entire crown with water and set a small weight (I used the water bottle) on the foam ball and let it dry
10.  Hot glue bead trim down the center of each arch
11.  Hot blue rhinestone trim around the band
12.  Add a decorative edge with hot glue around the edges of the arches
13. & 14.  Base coat the crown in Vintage Brass and then dry brush the color of your choice over the gold
15.  Paint another crown in gray and sponge DecoArt Metallic Lustres on top
16.  Embellish with rhinestone cup chain or trim to finish
To wear to your coronation!