Showing posts with label Home Decor. Show all posts

Tuesday, May 8, 2018

Oil Slick Vases

It has been my lifelong obsession to figure out how to paint an oil slick. You know, the rainbow swirls of color you see floating on top of black oil....They are mesmerizing!  Recently Unicorn SPiT created a sparkling version and BOOM!  Something clicked.  I experimented for a few days before I came up with this process and it ended up being super easy!  Don't you just love it when your craft space doubles as a science lab?!  Remember to experiment until you get it right and 
always Make Your Mark!
 A dash of sunlight and BOOM!  Color!
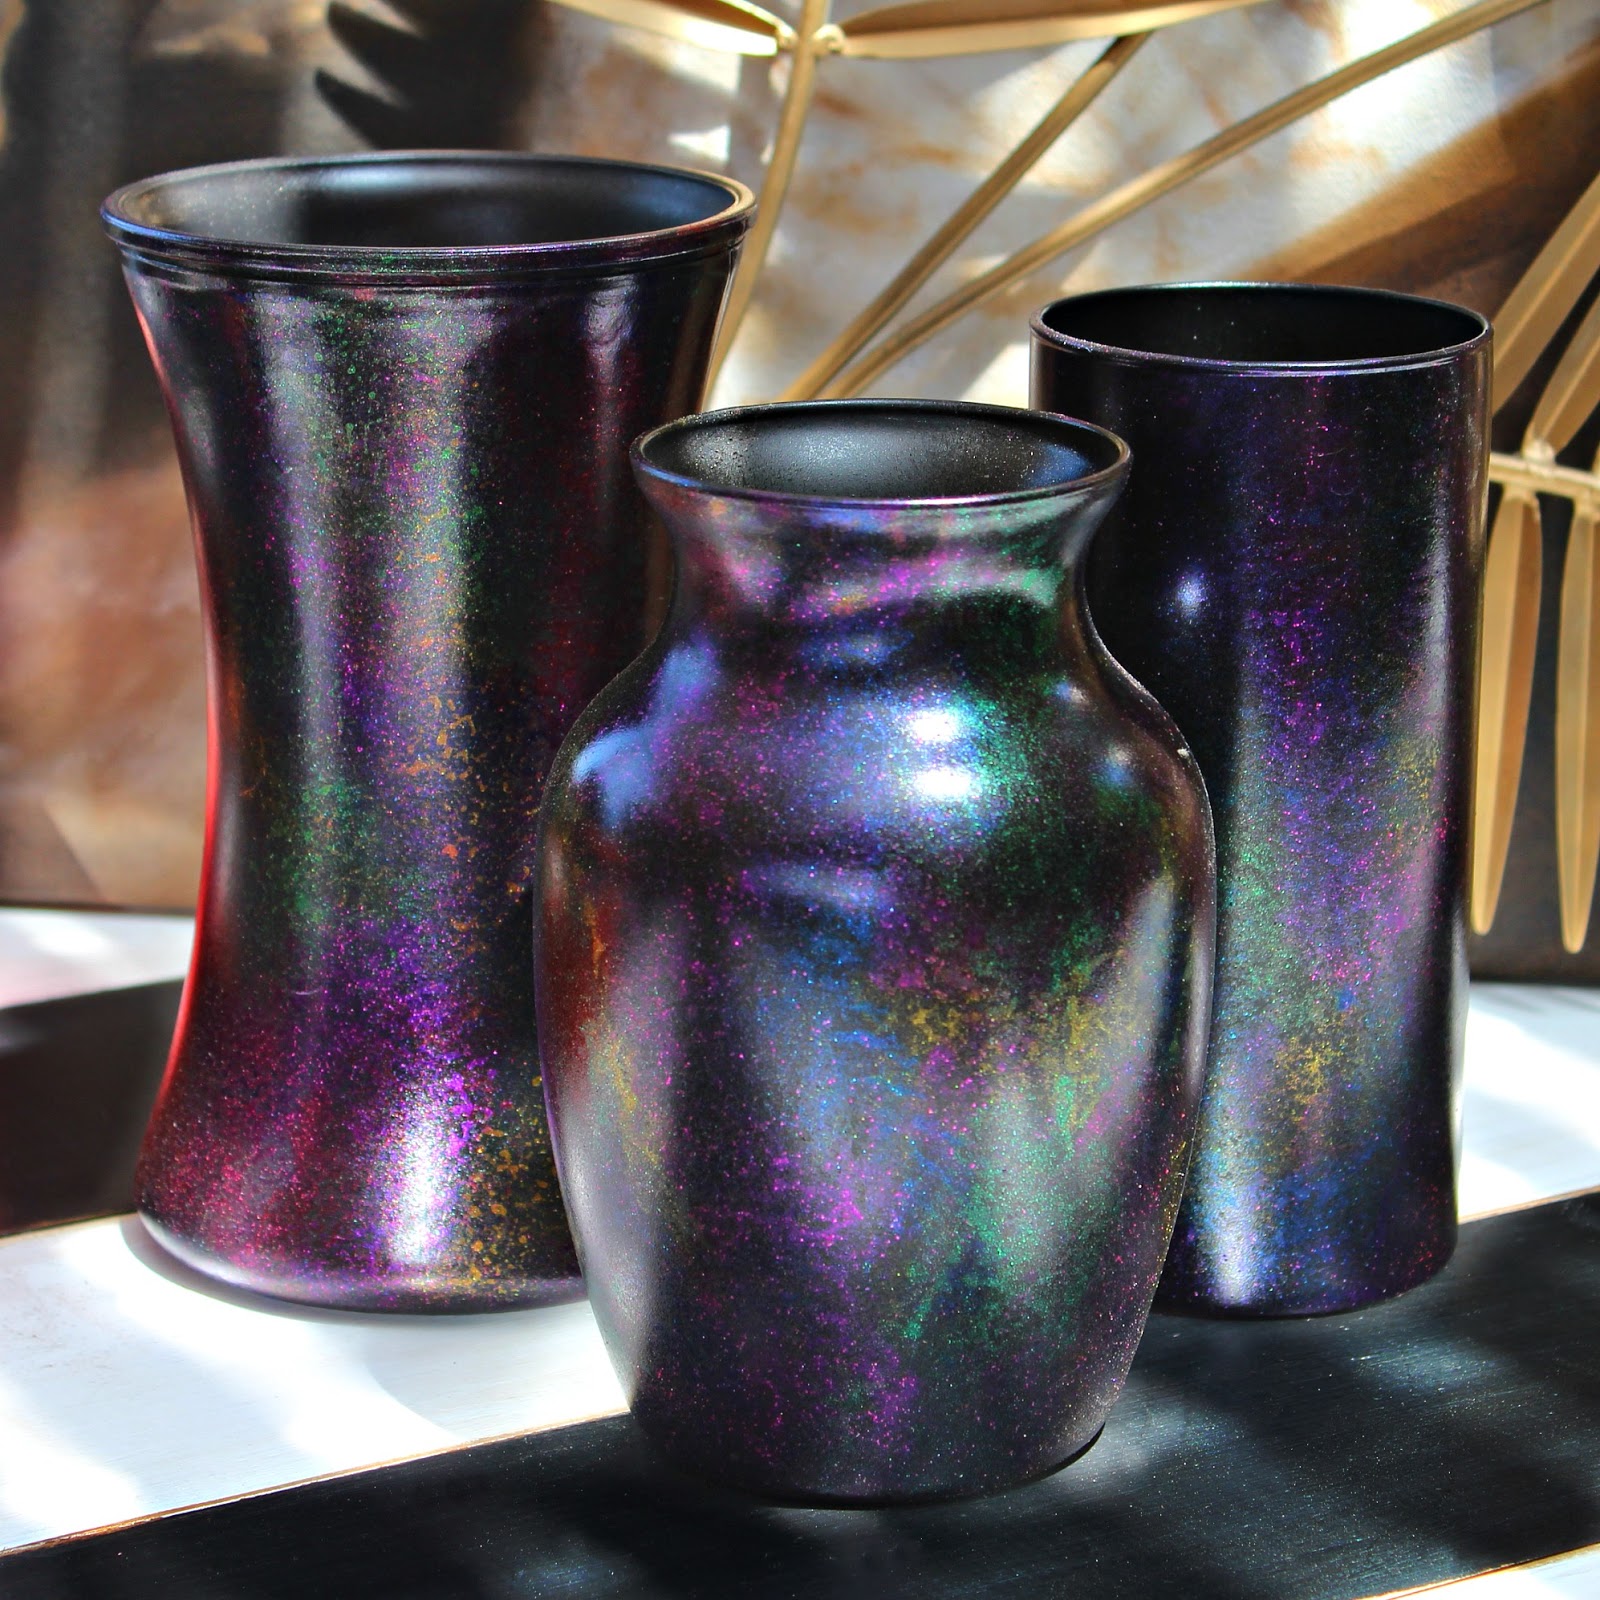
Glazed perfectly with a spray acrylic!

Watch how easy they are to make here!
STUFF I USED
Krylon flat black spray paint
Glass vases
Rust-Oleum Gloss Lacquer
Cut up kitchen sponges
 HERE'S HOW
1. Spray your glass vases flat black and let dry
2.  Sponge Golden Gosling on various parts of the vase
3.  Sponge Starling Sasha on a bit more of the vase blending, but not overlapping the colors
4.  Next sponge Lavish Lovebirds
5.  Finally sponge Violet Vulture and Sapphire Swift to completely cover the vase
*Blend the colors here and there so there is a nice transition from one to the other
6.  When dry, spray with a clear, high gloss lacquer and let dry
Voila!
Happy decorating!

Tuesday, December 20, 2016

No Sew Cactus Pillows

I've been seeing cute cactus pillows all over the web for a year now and it was finally time to try to make a few to give as gifts.  The best part about this project is that it's NO SEW.  Seriously, not one single stitch AND all of the raw edges are neatly covered.  Use this technique with leftover fabrics to make all kinds of pillow shapes. Use a different fabric on each side and really mix them up.   Remember, use pom-pom trim, add ric-rac to everything and always Make Your Mark!
Perfect for a little southwest feel!


 Watch how to make them here!
STUFF I USED
E-6000 Fabri-Fuse and Fray Lock
Colorful fabrics
Pillow stuffing
Ric rac trim
Straight pins
Cardboard or foam core
Pom pom trim
HERE'S HOW
1.  Pin and cut your cactus pattern on folded fabric so that you have both layers
2. & 3.  Place the pillow on cardboard and glue around the edges, leaving a 5" hole at the base of the cactus, using E-6000 Fabri-Fuse 
4. Using more Fabri-Fuse, glue pom pom trim around the edge of the entire pillow keeping the trim in place with pins around the curves
5. & 6.  Flip the cactus over and cover the raw edges by gluing ric-rac trim around the edges with a thick line of E-6000 Fray Lock and let dry
7.  Stuff the pillow at the base using a chopstick to push the stuffing in all the areas of the pillow
8. & 9.  Use more Fabri-Fuse on the 5" opening and pin the layers together with clothespins until it dries
Enjoy!

Saturday, August 27, 2016

Fringe Lamp DIY

I got up this morning thinking about a fringe lamp I made for The Big Ass Book of Home Decor.  What an easy project to make that can be done in any color to match any room.....with almost any wire lamp shade base.  I'm definitely going to revisit this project and see how I can update it.  Happy Saturday!  Remember to have fun, update old projects and always Make Your Mark!
Fringe comes in every color under the sun!
An expensive version with brass by Hans Agne-Jakobsson
Stuff You'll Need
Americana Multi-Surface Satin in Red Barn (or a color to match your fringe)
Several yards of 3" - 4" long fringe (longer if you can find it)
Hot glue gun
1 yard chain
"S" hook
Needle nose pliers
Wire lampshade
White glue

Here's How
1.  Cut your chain into 3 12" lengths.
2. Paint the wire lamp base with your red Multi-Surface Satin and let dry
3. & 4. Attach your chain on the wide end of the base equally spaced apart and connect the chains at the top with your “S” hook.
5. Carefully hot glue the fringe (using very little dabs of hot glue!) on each wire all over the base.
6. & 7.  add 1 or two rings of fringe on the inside by gluing the fringe in between the wires.
8.  Take your white glue and go around all of the fringe where it touches the wire frame.  Don’t worry, it will dry clear.


Sunday, May 1, 2016

My Favorite Vignettes

I love to see what people collect and how they display it!  This is a small collection of my favorite vignettes from around the web.  Enjoy and get inspired!
Oh, and don't forget to Make Your Mark.
By Gretha Scholtz 
From Lonny Magazine 
From Adore Magazine
By Belgian Pearls 
From House and Leisure Magazine
From Traditional Home Magazine

Wednesday, August 20, 2014

Beaded Pillows (without beading) DIY

I love the look of beaded pillows but let's face it, even with my obsessive compulsive tendencies I'm not going to spend 40+ hours beading a pillow!  Enter E-6000 Fabri-Fuse and an awesome stencil!  Beaded pillows can now be made in the time it takes for the glue to dry.  Here's how!

I love this flower pillow!  
My fancy beaded denim pillows!
Watch the video tutorial
YOU'LL NEED
1 yard heavy cotton
1 yard heavy denim
1/3 cup seed beads per pillow
Spray adhesive
Sewing machine
Straight pins
Pillow stuffing
Cut two pieces of fabric 19" x 19" 
Pin and stitch together using 1/2" seam allowance and leaving a 5" long hole
Clip the corners at an angle
Turn right side out and press flat 
 Spray the stencil with a light coating of spray adhesive
Center it on the pillow
Fill the stencil with a generous amount of E-6000 Fabri-Fuse
 Remove the stencil and sprinkle the beads on the Fabri-Fuse
*gently press down the beads if you need to
Repeat with the other areas of the stencil
Add a coating of clear acrylic IF you feel you didn't use enough glue
*This will insure that you don't lose any beads
For larger, more intricate stencils stick your stencil to the fabric
Squirt a generous amount of glue along the side of the stencil
Spread the glue with a piece of cardboard like a squeegee
Remove the stencil 
Sprinkle the beads and let dry overnight


Wednesday, May 21, 2014

Boho Rit Dyed and Painted Lace Lampshades

A few weeks ago I started experimenting with Rit Liquid Dye and now I'm completely hooked!  I've dyed everything in my house that can possibly be dyed and I'm still looking for more.  This week I tackled some lampshades for my patio chandelier.  I know!  Doesn't everyone have a chandelier on their patio?  It couldn't have been easier, too.  Another thing I learned is that you can paint lace metallic gold with DecoArt's Dazzling Metallics and it looks amazing.  Make sure to use the E-6000 Fabri-Fuse to glue on the lace because hot glue will melt if it's too close to the lightbulbs.  Check out the video tutorial below and leave a comment.  I'd love to hear from you.
My boho lampshades
A view to my backyard

Watch the video tutorial here
YOU'LL NEED
Rit Liquid Dye in Tangerine & Golden Yellow
Lampshades
Cotton Lace
Pie plate
Spray bottle
 1.  Wet your lampshade with a spray bottle (or put it under the sink)
2.  Fill a pie plate about 1/2" with hot water and add 2 cupfuls of Rit Liquid Dye in Golden Yellow
3.  Stir thoroughly and then rest the base of the lampshade in the dye for about five minutes.
 4. Fill your pie plate with hot water and 2 cupfuls of Tangerine Rit Liquid Dye.
5.  Stir and then dip the top of your lampshade in the dye for about 5 minutes.  
*Let it bleed upward to give an ombre effect.
6.  Cut your lace in different sized pieces.
7. Paint them with Dazzling Metallic Paint in Glorious Gold
8.  When they're dry, glue the lace to the lamp shade with E-6000 Fabri-Fuse and tape the pieces in place until they dry.


Wednesday, April 9, 2014

Mrs. Patmore's Canisters DIY

Miss Downton Abbey?  Need a little reminder in your kitchen until next season starts?  Why not make a set of Mrs. Patmore's canisters?  I have to say that she is, hands down, my favorite character on the show.  The best scenes are when she's being motherly with Daisy....They always make me choke up!  For this project I used Americana Chalky Finish Paints for Glass from DecoArt.  They are dishwasher safe, have a beautiful matte finish AND for this project they worked perfectly as a chalkboard finish.  I love this paint!  I also used power tools to create my lids from scratch.  You don't have to create your own lids from scratch, there are plenty of canister sets out there in need of a makeover!  Have fun.
One for Lady Edith, Daisy and Lady Mary
The lovely Mrs. Patmore
These are now in my kitchen
See the video right here!  
 YOU'LL NEED
Ceramic containers OR a set of ceramic canisters
Contact paper
Accent stencils (I used Botanical Garden from DecoArt)
Jigsaw
1/4" thick plywood
Wood knobs
Sanding blog OR sander
Paintbrushes
2 yards 1" wide ribbon
Chalk (optional)
1.  Trace the rim of your container on the plywood and cut it out with a jigsaw
2.  Sand the edges with a sanding block or a sander
3.  Trace a smaller circle (one that fits inside the mouth of the container)  This will secure the lid so that it doesn't slip off.  
4.  Cut it out and sand it like you did the first lid 
 5.  Using E-6000, glue the smaller circle to the underside of the larger circle
6.  Glue the knob to the center of the larger wood circle and let them dry for about an hour before you start painting them
8. When dry, tie a 14" piece of ribbon around the knob.
9.  Cut out an oval about 3 1/2" wide
10.  Trace it on some contact paper and cut out
11.  Apply it to the container and then fill in with the Americana Chalky Finish Paint for Glass
  12.  Remove the contact paper and place your accent stencils on each side of the painted oval
13.  Fill in with paint and let dry and then remove the stencils
14.  Bake the containers at 325˚ for 30 minutes, let cool and bake again.  This will make them dishwasher safe
Write whatever you like with chalk and display with pride knowing Mrs. Patmore would be very proud of you!

Tuesday, January 28, 2014

Thrift Store Side Table Makeover

Thrift store side tables make me very happy! They're like a blank canvas for a DIY'er.  I grabbed these two for $5 each in my neighborhood and knew exactly what to do with them.  Now you know I wouldn't steer you in the wrong direction so make sure to grab some Americana Decor Chalky Finish paints for your next project.  No sanding, priming or prep.  Just wipe off and paint!  Deco Art also makes an amazing line of large French theme stencils that were perfect for this project.  Have fun and get decorating!  

Ooh la la! 
Magnifique!
Oui!
Daubers
Large stencil
Paintbrush
Dust cloth
Sanding block
Masking tape 
$5 thrift store side tables......Pretty awful here, aren't they!
Here's the how-to video
Wipe down your piece and make sure it's free of dirt and dust and start painting! 
 These knobs were metal, but Americana Decor Chalky Finish paint is multi surface.
It dries to a beautiful chalky finish.  
When dry, take a sanding block and distress the edges. 

Use small pieces of masking tape to secure your stencil. 
Using a dauber, lightly fill in your stencil using very little paint and adding more paint as you go along.  Too much paint in the beginning can seep under your stencil and ruin the crispness of the images and lettering. 
You're done!
Americana Decor Chalky Finish paints come in 29 designer colors!