Showing posts with label Christmas Ornaments DIY. Show all posts

Thursday, December 7, 2023

Embossed Iridescent Paper Ornaments

Hey friends, great to see you here!  This is an ornament making technique I've been using for years and there are a thousand different ways to make them. You can use photos, Loteria paper or different colors of cardstock. Whatever you have hanging around. It's like math, magic and origami all mixed together. For this particular version I embossed black watercolor paper and then used this incredible pearlescent acrylic ink from Royal Talens that shows up brilliantly on black surfaces. It worked like a charm!  I hope you make some of these fabulous Christmas ornaments - at least your own version!  
Love, Mark!
My trio of Christmas ornaments in 3 of my favorite iridescent colors!
Watch how to make them here or on my YouTube channel here:  https://youtu.be/JyXNLkIBH3A
Here's everything I used for this project:
Amsterdam Acrylic Iridescent Inks: https://www.dickblick.com/products/amsterdam-acrylic-ink/ SIZZIX Big Shot Embossing Machine: https://bit.ly/3Z5ILQS Van Gogh Black Watercolor Paper: https://bit.ly/3R4fVx1
I used a drinking straw inside for the structure but you could use a rolled paper straw
This stuff is magic!
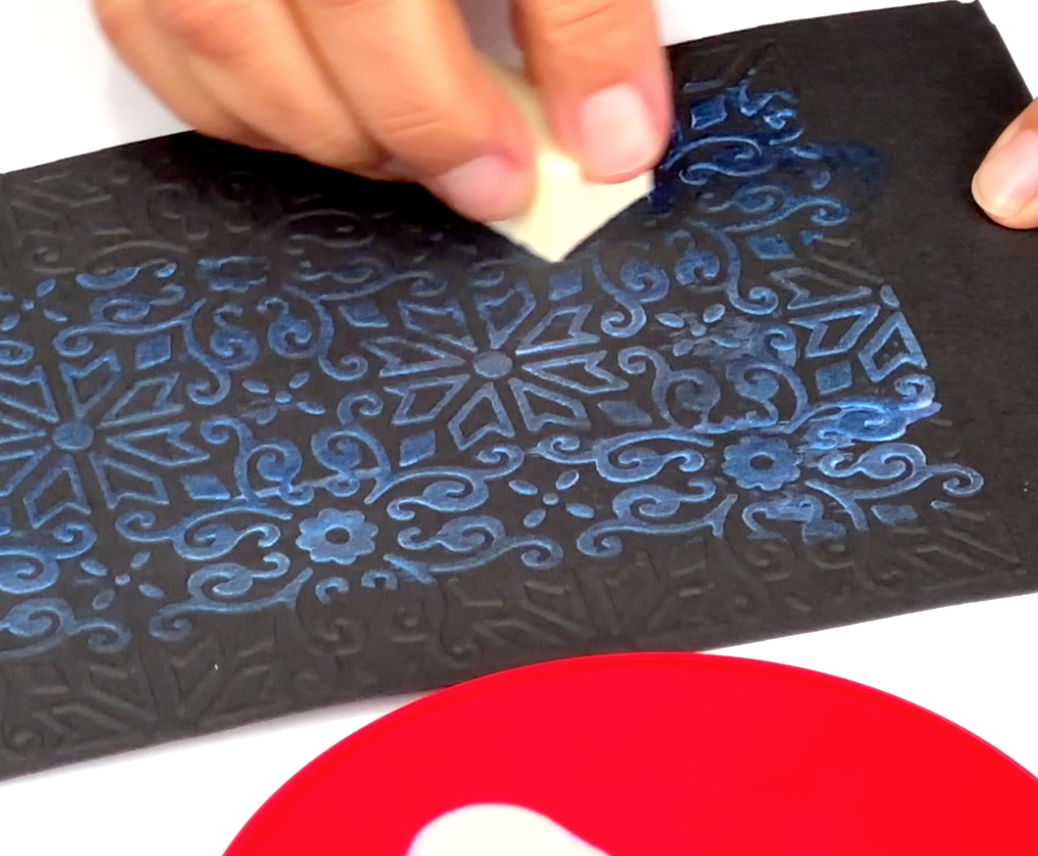
Wiping it over the embossing and it just appears and the most beautiful way!
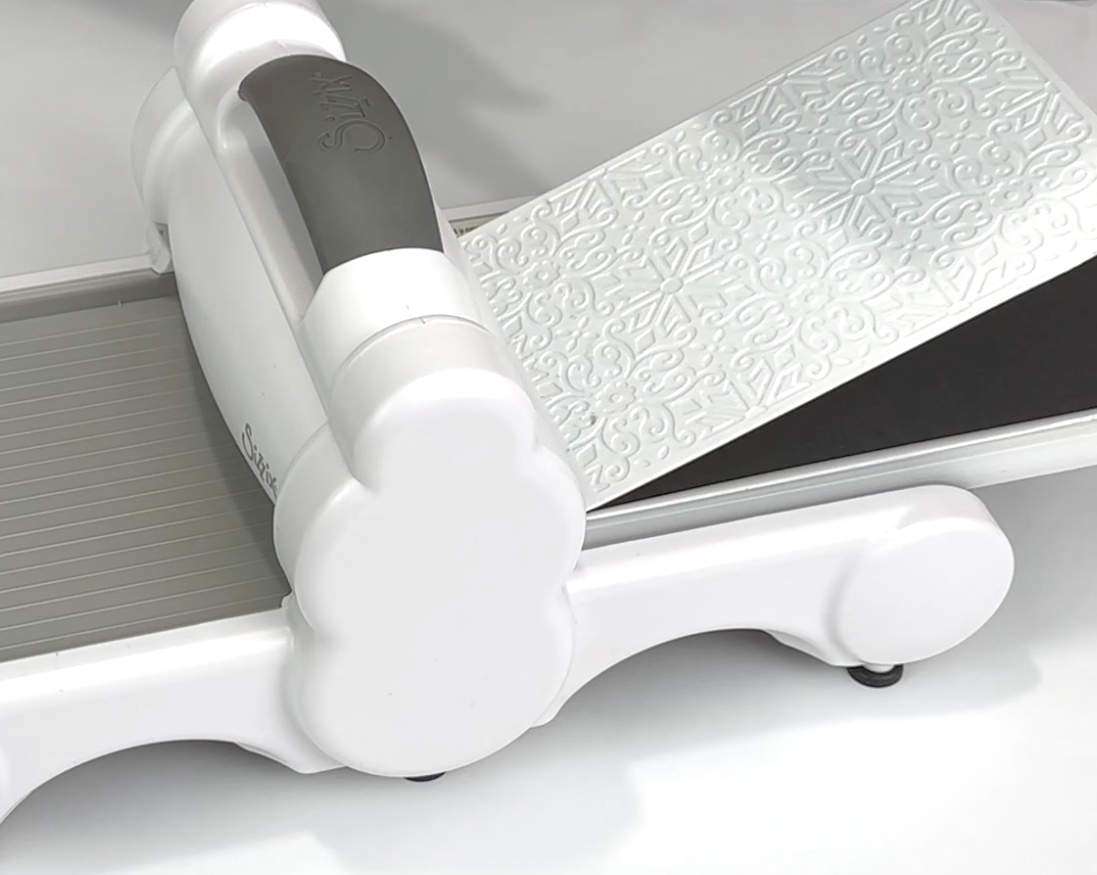
I'm obsessed with embossing anything and everything. I love my Big Shot from Sizzix and am thinking about getting a much larger version!
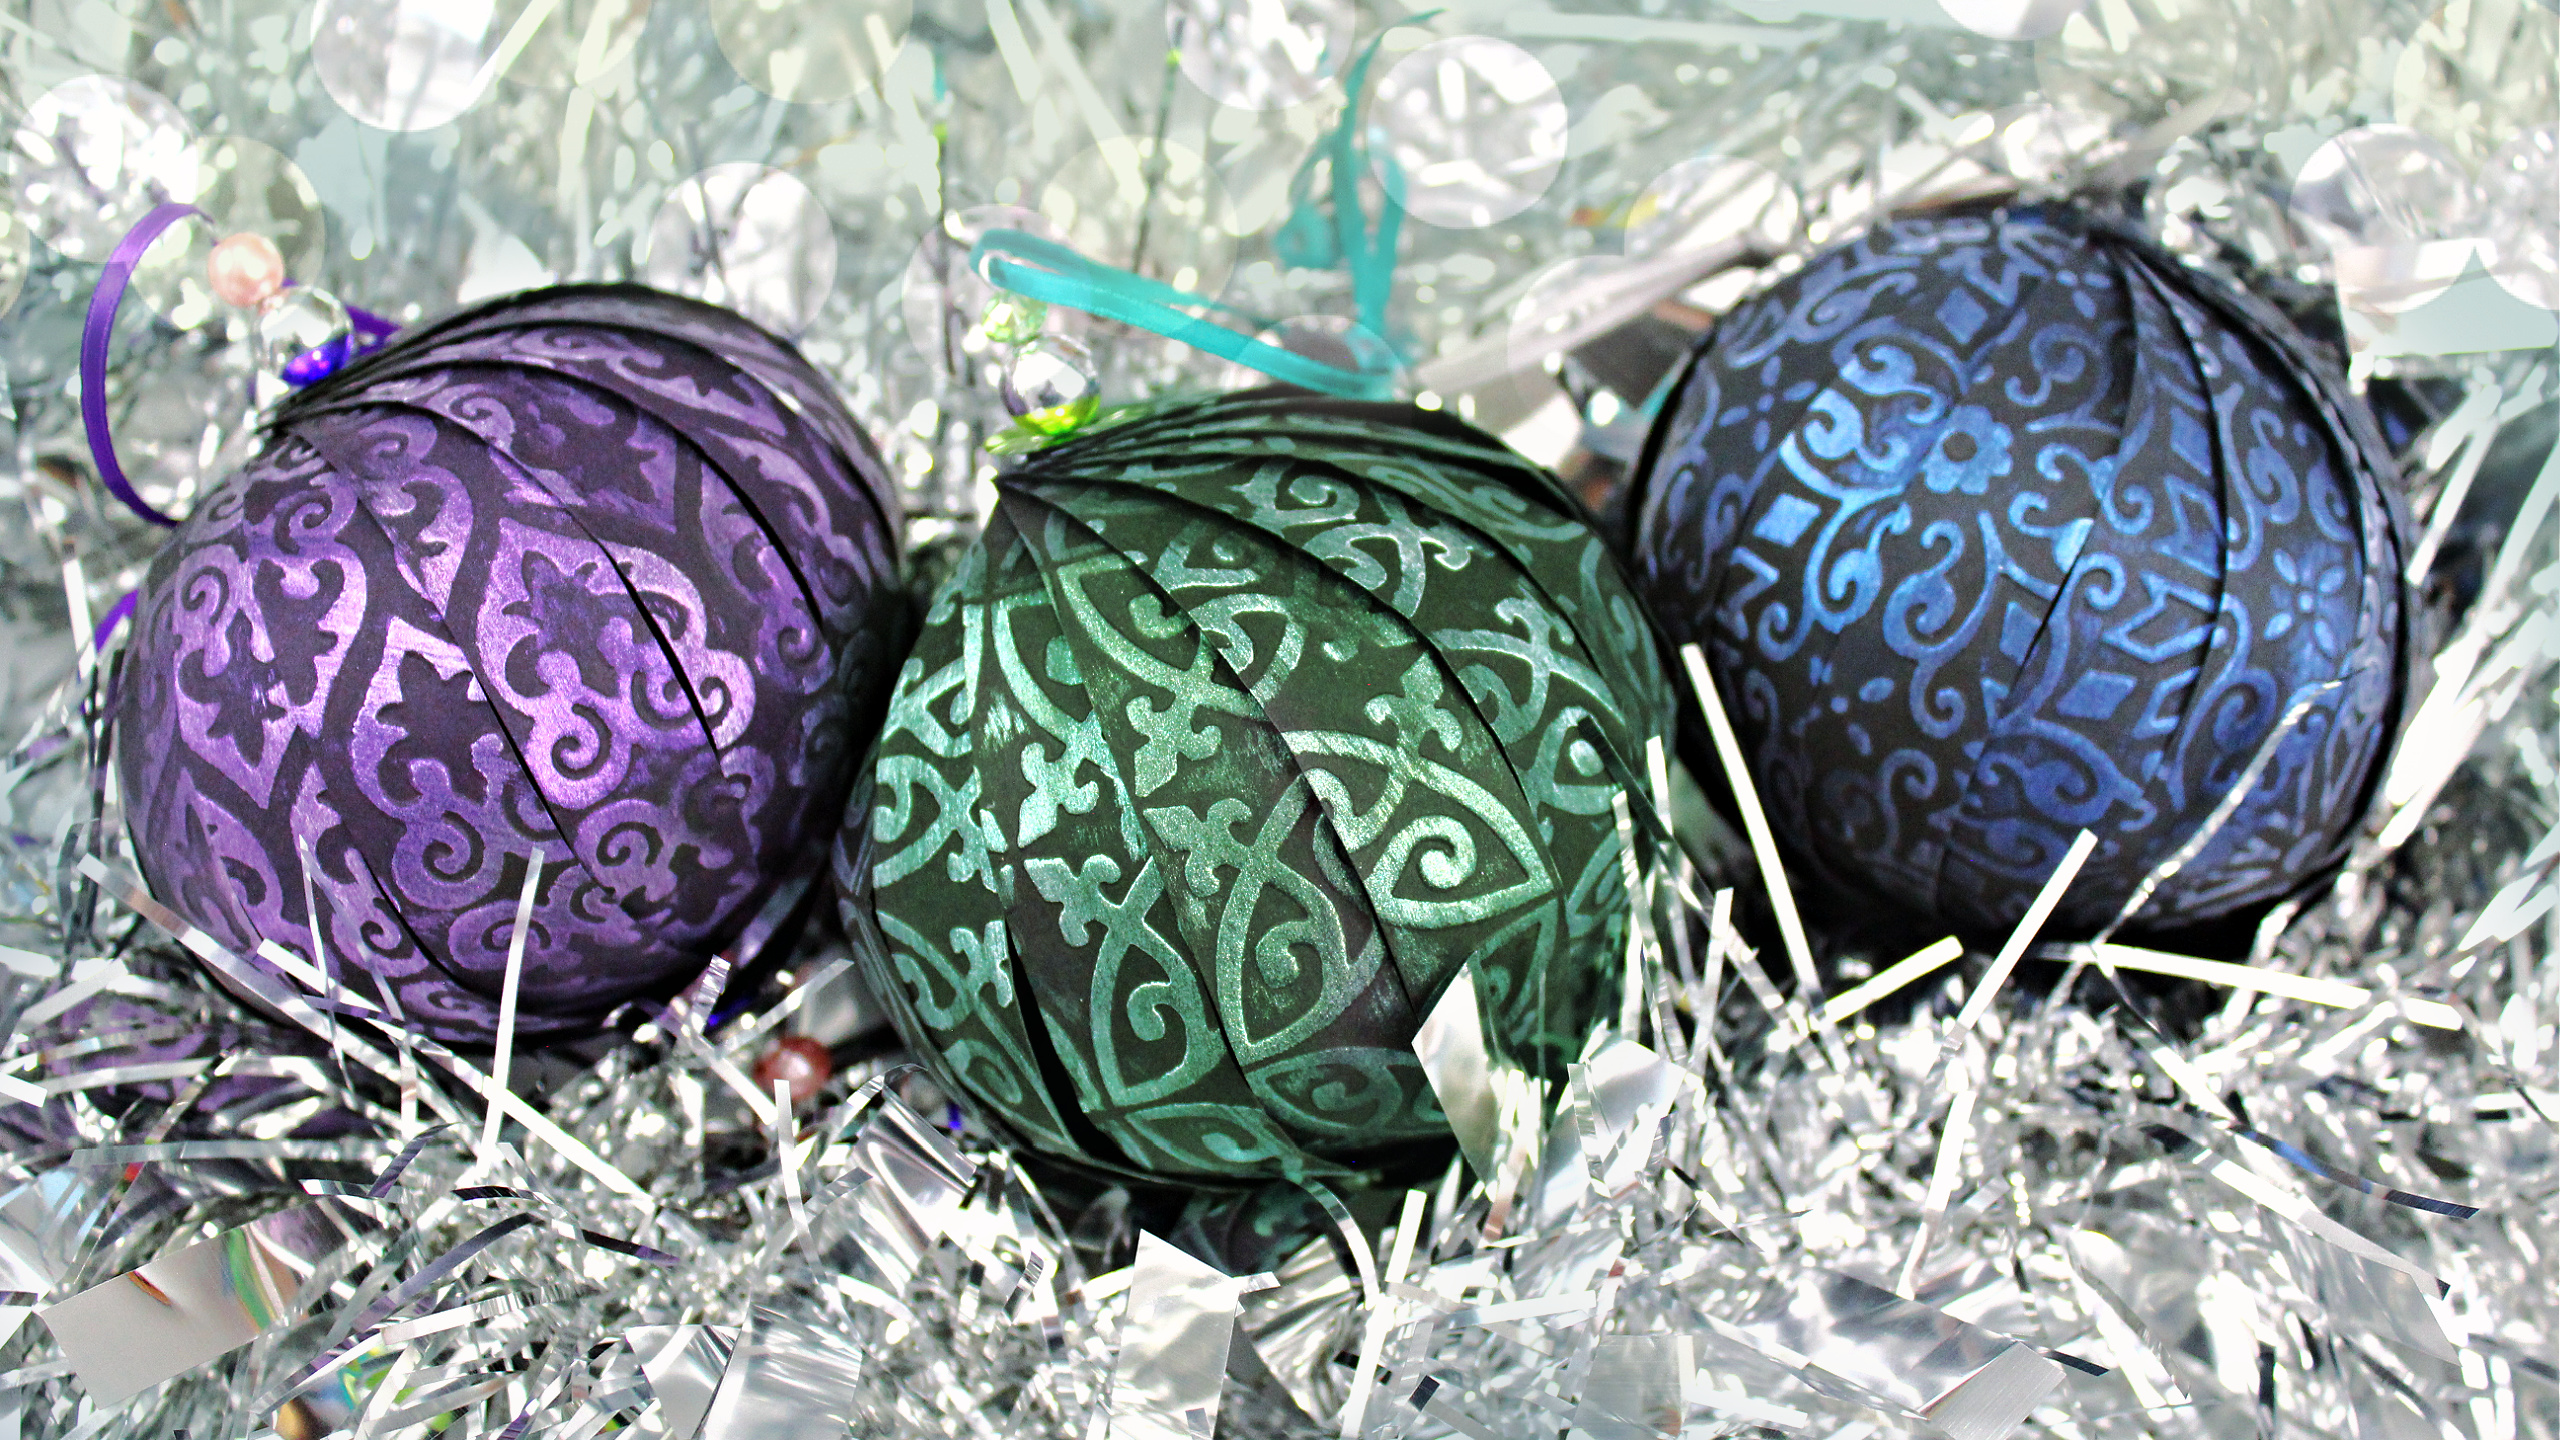
Merry Christmas!  Love, Mark!


Monday, December 9, 2019

Vintage Mirror Ornaments

There is a 99c store in my area that has a HUGE craft section filled with tons of odds and ends.  Everything from tiny mirrors to funky colorful beads and wood shapes ready for painting & staining.  I finally grabbed some tiny mirrors last year but have been holding on to them for the perfect craft, and when Christmas rolled around I was ready!  Something about the book pages mixed with the light blue & gold remind me of Francois Boucher, the French Rococo painter.  They also feel like they belong on a tree in the late Victorian era, too.  The best part of these ornaments is that they're made from cardboard!  Yup, that's right!  Use what you have, my crafty friends, and don't forget to 
 Make Your Mark!
 One of these would make the perfect gift!
Cheap pearl trim mixed with sparkly cup chain makes a great combo!

Watch how to make them here!
Print on standard copy paper and don't forget to mark your notches!


That's  me at your front door singing carols!  Happy Christmas!

Friday, November 30, 2018

Neon Cardboard Ornaments DIY

Amazon.com is my drug of choice.  It really does make my crafty life easier.  While perusing for some cardboard shipping materials a few weeks back, I found this NEON corrugated cardboard....I immediately ordered it BEFORE I knew what it would become.  That's how I know I have a problem!  Cut to a 2 a.m. ornament making binge on my kitchen table where these little gems appeared.  Grab a stack and start gluing.  It's easy!  It's never a waste to buy things that inspire your creativity and help you Make Your Mark!
Brighten up your tree!
Love the sparkle!


Watch how to make them here!
STUFF I USED
*You can easily make 50+ ornaments with this stack
HERE'S HOW
1st ORNAMENT Steps 1 - 6
1.  Cut 2 strips in the same color 12" x 1" and 4 strips 12" x 1 1/2" in different colors
2.  Cut the 1 1/2" wide strips in 1/2 diagonally to create long triangles
3. Roll and hot glue the 1" strips into a disk for the center of the ornament
4.  Roll and hot glue the triangular stripes into tiny cones
5.  Glue the cones on the flat sides of the disk
6.  Glue the rest of the cones evenly around the disk
2nd ORNAMENT Steps 7 - 11
7.  Cut 4 different colors of cardboard in the following sizes:
4" x 4"
7" x 3"
7" x 2"
12" x 1"
8.  Glue and roll the 4" x 4" piece to create a tube
*This is the center
9.  Glue and roll the 7" x 3" piece around the center tube
10.  Glue and roll the 7" x 2" piece next
11. Finish by gluing and rolling the 12" x 1" piece around the center
3rd ORNAMENT Steps 12 -15
12.  Cut two 1/2" wide strips in one color and two 2 1/2" strips in another color
*Cut the 2 1/2" strips on the diagonal to create long triangles
13.  Glue and roll the 1/2" wide strip into a disk
14.  Glue and roll the long triangles in to long cones
15.  Glue the cones to the flat sides of the disk
LET'S EMBELLISH THE ORNAMENTS
16.  Cut a 3" piece of metallic fringe and glue a loop to one end
17.  Hot glue and roll the fringe trapping the loop in the center to create a tassel
18.  Hot glue a loop in the top of each ornament and a tassel at the bottom
19. & 20.  Embellish the ornaments with Allure in Silver Glitter
*Add more glitter while wet if you want!

Happy Holidays!

Friday, November 2, 2018

Mexico Inspired Ornaments

I love everything about Mexico.  The color, the art, the architecture and the FOOD all make me fantastically happy!  It's part of why I love living in Los Angeles so much. Years ago I bought a painted, hand carved ornament in Mexico City and have always been inspired by it.  These are a cardboard and hot glue version of that ornament and I couldn't be happier with them.  Grab a few re•design with Prima silicone molds and you'll be making ornaments for the next 10 years!
We have tons of ornament DIYs coming your way so stay tuned and don't forget
to Make Your Mark!
Fabulous Frida!

Use images or just go for color!
STUFF I USED
Cardboard 
Glue gun and tons of glue sticks
Images of Frida or sacred hearts
HERE'S HOW
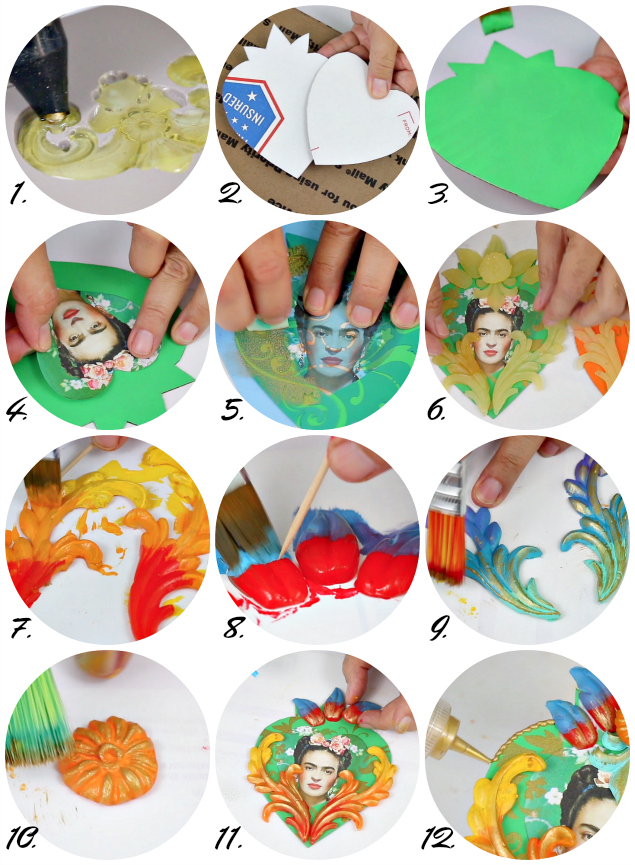
1.  Fill the re•design with Prima molds with hot glue
*I like to use 2 large glue guns with the big fat glue sticks so that I can fill them quickly
2.  Cut out hearts in cardboard
3.  Paint the pieces in bright colors
*I used Americana Acrylics in Bright Orange and Bright Green
4.  Cut out and glue an image in the center of one of your hearts
5.  Stencil around the image with DecoArt Matte Metallics in Vintage Brass
*I used a Tracy Moreau stencil for this ornament
6. Figure out the molded piece arrangement
7. & 8. Paint the pieces in more Americana Acrylics and let dry
9. & 10.  Dry brush the pieces with Matte Metallics 
11.  Glue the pieces to the cardboard
12.  Edge in E-6000 Dimensional Design Adhesive Paint in Gold Leaf
Fiesta Fantastic!
Feliz Navidad!

Tuesday, December 1, 2015

Christmas Balls 2015!

With the help of GraphicStock.com I was able to print out some terrific holiday images and turn them into fun card stock Christmas ornaments!  You can make these with family photos, different colors of card stock or old holiday cards.  Once you get the hang of it, it's addicting!  Head over to GraphicStock.com for a free 7 day trial and download tons of images that you can use for the holidays...Seriously, TONS of fantastic images for every occasion!
Have fun!  xoxo, Mark


See how I made them here!
Print this on 8 1/2" x 11" card stock
OR head to GraphicStock.com and pick some others!
Holiday print out on card stock
8” medium gage wire
Ruler
Needle nose pliers
Scissors 
2 beads, 2 large sequins
1 drinking straw
Large safety pin or needle
Pin cushion 
10” of ribbon

1. Trim your print out to 6" x 11" making sure the image falls at the 3" mark
2. Cut 6” x 3/4” wide strips as you see in the photo.  You will need 16 strips so save the extra pieces for filler
3.  With your safety pin, poke a hole on each end of each strip 1/4” up from the edge and right in the center
4.  Poke a hole in the center of the large sequins if you need to
5.  Cut the straw to 3"
6.  Bend a loop in the end of the wire
7.  Add a bead and then a sequin
8.  Line your strips in a stack in order
9.  Starting at the top of the stack, thread them on the wire FACE DOWN toward the sequin
10.  Add the straw
11.  Starting from the strip that touches the sequin, thread each strip on the wire one by one
12.  Add a sequin, then a bead, clip and bend a loop in the wire.
Hang on a ribbon and you're done!
Happy Holidays!