Showing posts with label Allure Dimensional Design Adhesive Paint. Show all posts

Friday, December 7, 2018

Sparkling New Year's Centerpiece DIY

This year I thought I'd go a little less traditional for my New Year's centerpiece.  I used leftover wood scraps from earlier projects and grabbed some fairy lights on Amazon to add a little magic.  The key with any centerpiece is to go high and leave lots of room on the table for the champagne and snack trays.  Toss in a few ornaments from your tree and a strand of sparkly garland and you're ready to ring in the new year.  However you decorate for the new year, just make sure you add some sparkle!  Oh, and don't forget to Make Your Mark!
Got the mylar streamers for a song at a party store!

Laugh every day!
Watch how to make my centerpiece here!
STUFF I USED
E-6000 Glue
Allure Glitter in Crystal and Silver
1" x 12" wood trim pieces (5 per star)
4" x 4" wood blocks
1/4" thick dowels about 10" long
 HERE'S HOW
1.  Drill a hole in the center of your wood blocks
*The drill bit should be the same diameter as your dowel
2.  Stain 5 pieces of the 1" x 12" trim with the Unicorn SPiT Sparkling in your color scheme
3.  Add Allure Glitter in Crystal to add even more sparkle to the trim
4.  Stain the wood blocks with Unicorn SPiT Sparkling in two colors
5.  When everything is dry, sand the edges for a distressed look
6.  Glue the 1" trim pieces to make a star
7.  Glue a dowel on the back and let dry
8.  Stencil a design on the wood using a pallet knife and Allure Glitter in Silver
9.  When everything is dry, assemble the pieces and wrap the star in fairy lights
To an amazing New Year!
Happy 2019!

Friday, November 30, 2018

Neon Cardboard Ornaments DIY

Amazon.com is my drug of choice.  It really does make my crafty life easier.  While perusing for some cardboard shipping materials a few weeks back, I found this NEON corrugated cardboard....I immediately ordered it BEFORE I knew what it would become.  That's how I know I have a problem!  Cut to a 2 a.m. ornament making binge on my kitchen table where these little gems appeared.  Grab a stack and start gluing.  It's easy!  It's never a waste to buy things that inspire your creativity and help you Make Your Mark!
Brighten up your tree!
Love the sparkle!


Watch how to make them here!
STUFF I USED
*You can easily make 50+ ornaments with this stack
HERE'S HOW
1st ORNAMENT Steps 1 - 6
1.  Cut 2 strips in the same color 12" x 1" and 4 strips 12" x 1 1/2" in different colors
2.  Cut the 1 1/2" wide strips in 1/2 diagonally to create long triangles
3. Roll and hot glue the 1" strips into a disk for the center of the ornament
4.  Roll and hot glue the triangular stripes into tiny cones
5.  Glue the cones on the flat sides of the disk
6.  Glue the rest of the cones evenly around the disk
2nd ORNAMENT Steps 7 - 11
7.  Cut 4 different colors of cardboard in the following sizes:
4" x 4"
7" x 3"
7" x 2"
12" x 1"
8.  Glue and roll the 4" x 4" piece to create a tube
*This is the center
9.  Glue and roll the 7" x 3" piece around the center tube
10.  Glue and roll the 7" x 2" piece next
11. Finish by gluing and rolling the 12" x 1" piece around the center
3rd ORNAMENT Steps 12 -15
12.  Cut two 1/2" wide strips in one color and two 2 1/2" strips in another color
*Cut the 2 1/2" strips on the diagonal to create long triangles
13.  Glue and roll the 1/2" wide strip into a disk
14.  Glue and roll the long triangles in to long cones
15.  Glue the cones to the flat sides of the disk
LET'S EMBELLISH THE ORNAMENTS
16.  Cut a 3" piece of metallic fringe and glue a loop to one end
17.  Hot glue and roll the fringe trapping the loop in the center to create a tassel
18.  Hot glue a loop in the top of each ornament and a tassel at the bottom
19. & 20.  Embellish the ornaments with Allure in Silver Glitter
*Add more glitter while wet if you want!

Happy Holidays!

Friday, November 9, 2018

Magical Origami Star Ornaments

These origami stars are easy to make and you can use them for the holidays in several different ways!  I'm going to hang some on my tree and turn some into Christmas cards.  Use patterned paper or stencil them like I did.  Pop a little gem in the middle and you have something super special.
Let your star shine this holiday season and don't forget to 
Make Your Mark! 
 You're a star!
 Book pages and kraft paper
Add a dab of glitter or a gem in the center....Easy peasy!
HERE'S WHAT I USED
Flat back gems
DecoArt Matte Metallics in Vintage Brass
Kraft paper & book pages
Tracy Moreau Snowflake Stencil
Allure Dimensional Design Adhesive Paint in Gold Leaf and Silver Glitter
Americana Acrylics in White
Watch how to make them here!


Tuesday, October 9, 2018

Mexican Tin Hearts

My first version of Mexican Tin Hearts from a few years ago is still getting tons of attention so I decided to up the game a little and try a few different techniques for this version.  I love the versions I see for sale, but I'd go broke buying every one of them.  Instead, here's an inexpensive way to make your own. Head to the hardware store and grab some aluminum flashing and serrated edge scissors and you're halfway there. Also, if you have some thin cotton gloves, that can be helpful.  I tend to scratch myself when I'm cutting the flashing.  Have fun, make art and don't forget to 
Make Your Mark!


 My trio of hearts
Watch how to make them here!
STUFF I USED
Aluminum Flashing and Serrated Blade Scissors
Hot glue and glue gun
Prima silicone molds
Americana Acrylic Paints
DecoArt Matte Metallic Paint in Vintage Brass
Allure Dimensional Design Adhesive Paints
Loteria Images
Pattern for heart and frame
Print on standard copy paper
 HERE'S HOW
1. & 2.  Trace and cut the heart and frame from the aluminum flashing using serrated edge scissors
and making sure to cut off the sharp points on the flames
3.  Trace a loteria image in the center of the frame, cut of the corners of the frame piece (to the corner of the tracing) and then bend each side upward
4.  Paint the flame part of the flashing black and the base in a light color of your choosing 
5.  Paint flowers, leaves and teardrops using a small round brush around the heart
6.  Paint gold teardrops on the flame with Matte Metallics in Vintage Brass
7. & 8.  Accent the flowers and teardrops with different colors
*The more color the better!
9.  Paint the outside and inside of the frame piece in two different colors
10. & 11. Using Allure Dimensional Design Adhesive Paint, dot all around the edge of the heart, around the edges of the frame piece and along the top of the flame
12.  Glue the loteria card inside of the painted frame piece
13. & 14.  Fill the Prima silicone flower mold with hot glue, remove the flowers and 
paint in different colors
15.  Dry brush the flowers with the Matte Metallics
16  Glue the frame and the flowers on top of the painted heart
La Sirena, my favorite!
All in all another heart on the wall 
I'll bet your friends would love one!

Friday, March 16, 2018

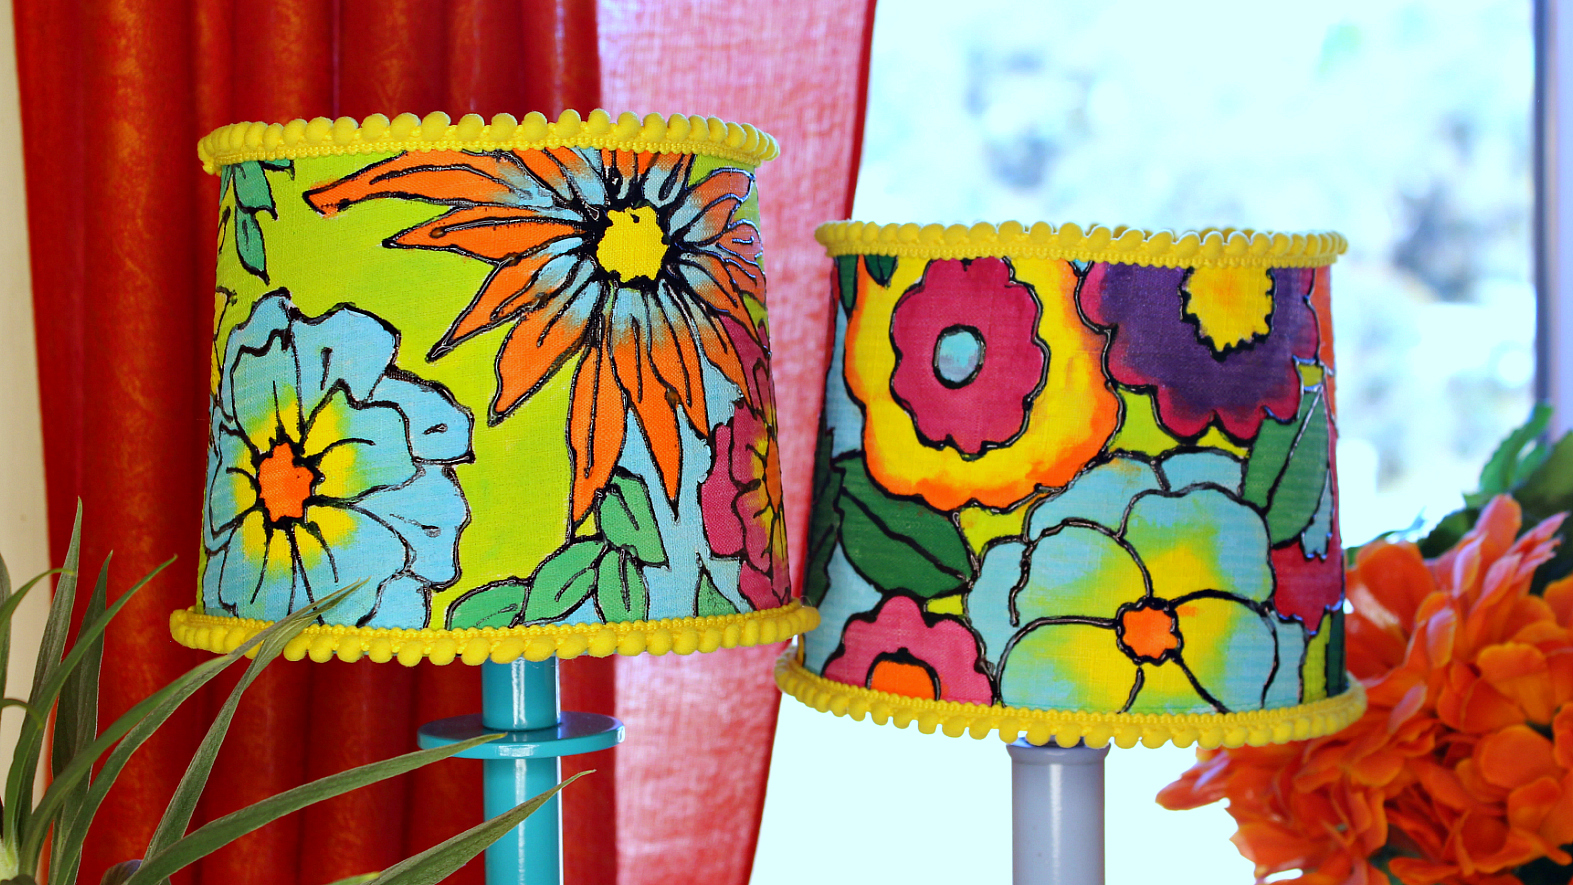
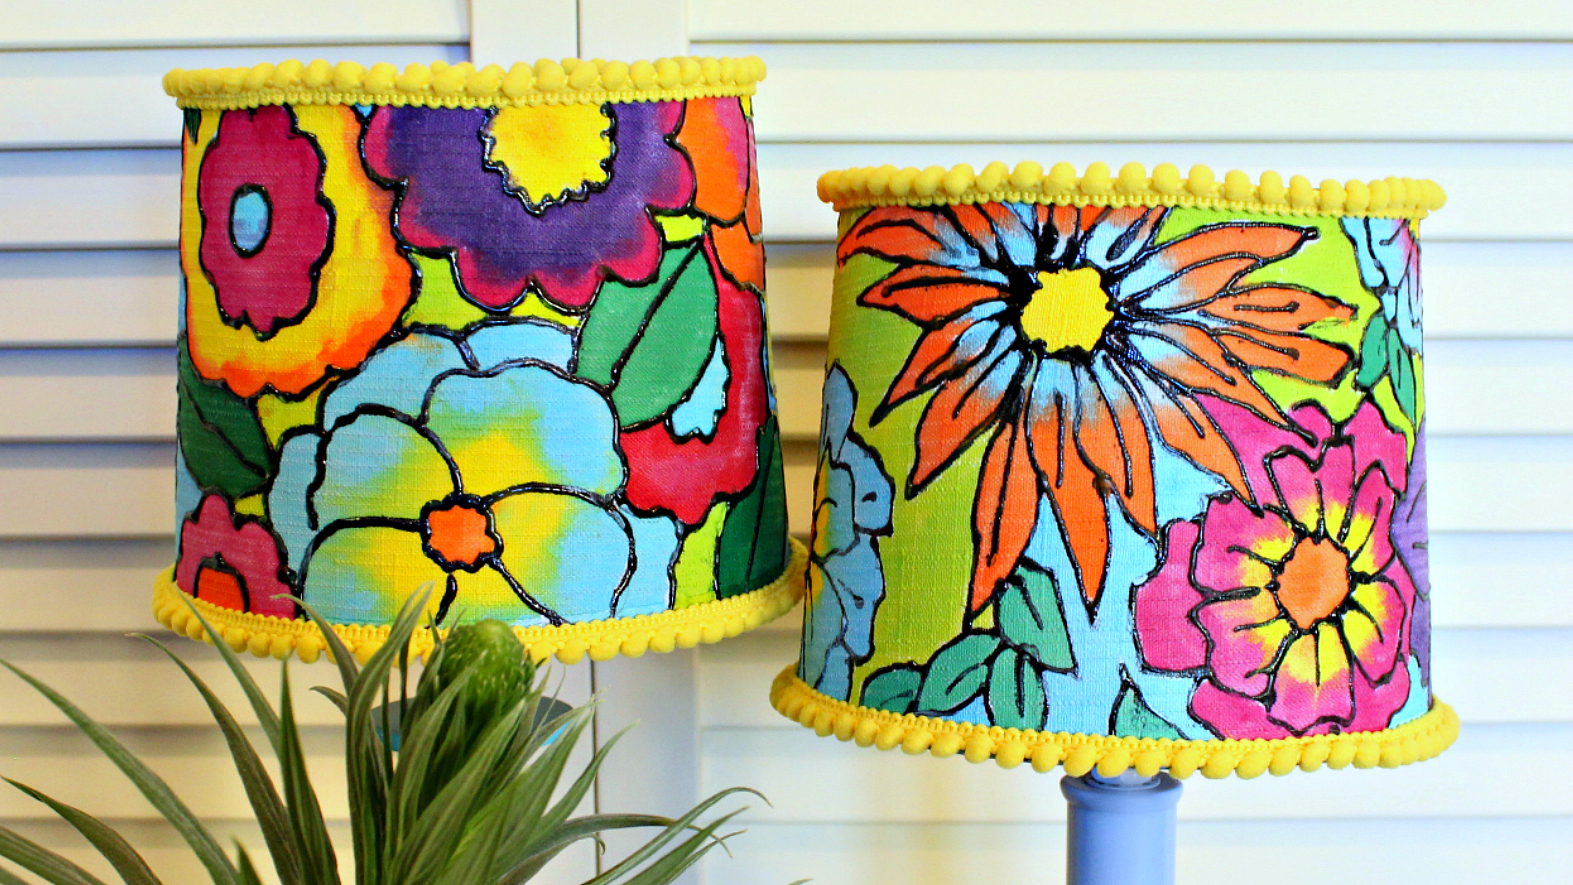
Floral Lampshades with Unicorn SPiT

I snagged some simple lampshades at a thrift store for a song and you know me, if I can paint it or glue something on it, it's not safe! It's just how I live my life, friends.  I pulled out a few of my favorite adult coloring book pages for a pattern inspiration and then went nuts with my stash of Unicorn SPiT.  I used floral pages, but any pattern would work.  You might try copying the page and coloring it before you jump into painting the lampshade. This way you'll know how you want them to look.  I think they give a stained glass feel and that's just fine with me.  Remember, if it's not tied down, embellish it!  Oh, and always Make Your Mark!
 Flower power!
 Brightening a corner of my kitchen

Watch how to make them here!
STUFF I USED
Plain fabric lampshades
Allure Dimensional Design Adhesive Paint in Gloss Black
Clothespins 
Pompom trim
E-6000 Fabri-Fuse
HERE'S HOW
1.  Trace the shape of the lampshade on the back of the adult coloring book page and cut out
2.  Tape it inside the lampshade and put the lamp inside
3.  With the lightbulb on, trace the pages lightly with a pencil
4.  Trace over the pencil lines with Allure in Gloss Black and let dry
5. - 9. Slightly water down your favorite colors of Unicorn SPiT and start painting the flowers and leaves
10.  When the shades are dry, spray them with Minwax lacquer and let dry
11.  Using E-6000 Fabri-Fuse, glue mini pompom trim around the rims of each shade
12.  Hold in place with clothespins while they dry
 Brilliant and blooming!
Spring has sprung!

Tuesday, February 6, 2018

Vintage Heart Ornaments

Got some cardboard, beads and wire in your craft stash?  If so, why not make some vintage heart ornaments to give away this Valentine's Day!  This is the perfect project to use up that stack of Amazon Prime cardboard.  I used stencils to decorate my hearts, but you could hand paint them or decoupage images on them...Whatever you want!   Surprise your loved ones by hanging one from the rear view mirror in their car on Valentine's Day!  I have a feeling they would just love it. 
Enjoy the holiday of love and don't forget to Make Your Mark!
 YOU are the key to my heart...


Watch how to make them here!
STUFF I USED
Cardboard & book pages
Americana Decoupage
Allure Dimensional Design Adhesive Paint in Gold Glitter
DecoArt Stencil
Wire & wire cutters
Keys, ribbon & beads
DecoArt Extreme Sheen & Americana Acrylics in Cadmium Red
Optional: Glitter & Glue
HERE'S HOW
1.  & 2. Cut out cardboard hearts & glue them together in layers of 3
3.  Cut out book pages about 1" larger than the hearts all the way around
4.  After misting the book page with water, spread decoupage on it and place your heart in the center
 *Clip the edges and fold them over the side of the heart and repeat on the other side until the
entire heart is covered in text
5. When the heart is dry, stencil it with red acrylic paint
6. - 8. Embellish with Gold Glitter Allure or glue and glitter
9.  Bend a loop on the end of a 6" piece of wire
10.  Pierce the heart from top to bottom and bend another loop on the end of the wire
11.  Hang beads and a key from more wire from the base and a ribbon for hanging from the top
12.  Glue on a printed banner
 Ready for Valentine's Day!


Friday, December 1, 2017

Vintage Bird Ornaments

Grab some cardboard and some old book pages and make these super cute vintage bird ornaments! Copy a book page if you don't have a damaged book you can use.  Most of what you need to make these ornaments you probably already have, too!  Use curling ribbon or string if you don't have satin ribbon or use scrapbook paper over the cardboard bases if you don't have a stencil. So many variations and Christmas is right around the corner.  I'll bet your friends would love a couple, too.  Happy holidays and always Make Your Mark!


Watch how to make them here!
STUFF I USED
Cardboard
Wire
Small jingle bells
Americana Acrylics
M Squared Stencils
Allure Dimensional Design Adhesive Paint in Glitter
Cosmetic sponges (for stenciling)
Book pages
 HERE'S HOW
1.  - 3.  Trace, cute and glue together 3 cardboard birds
4.  Cut book pages 1" larger than the bird pattern (all the way around) 
5. - 7.  Mist with water and decoupage to each side of the bird making sure to cut slits so that the edges fold over to the other side
8. - 9.  Stencil and embellish with paint and glitter
10.  Bend a loop on a 5" piece of wire
11.  Push it through the center of the bird and bend a loop on the other side
12.  Hand a bell on the bottom with a jump ring and tie a ribbon on the top to hang
Bird pattern
Cut 3 in cardboard
Merry Christmas!